Securing a Vue.js app and API with IdentityServer - Part 5
This is part 5 of a series showing you how to secure a Vue.js app with IdentityServer and call an ASP.NET Core Web API.
- Part 1 - Overview and Solution Structure
- Part 2 - Creating and Configuring your IdentityServer
- Part 3 - Adding Google Authentication to IdentityServer
- Part 4 - Creating and securing an ASP.NET Core Web API
- Part 5 - Creating the Vue.js client (this post)
- Part 6 - Calling an HTTP API from Vue.js
- Part 7 - Securing a router view in Vue.js
- Part 8 - Calling a secured API from Vue.js
- Part 9 - Refreshing identity tokens with Vue.js
Note: You can find the source code for this post series on GitHub.
Creating a Vue.js Client app
For this part of the exercise, we’re going to need a few tools to be installed.
We’ll need yarn installed (or you can use npm if you prefer), and we’ll also need to add the vue-cli utility.
Assuming you’re using Windows you can either manually install it, or use Chocolatey. Either way, the instructions are at https://yarnpkg.com/en/docs/install, and I’ll leave it as an exercise for you to complete. (P.S. My personal preference is to install using Chocolatey)
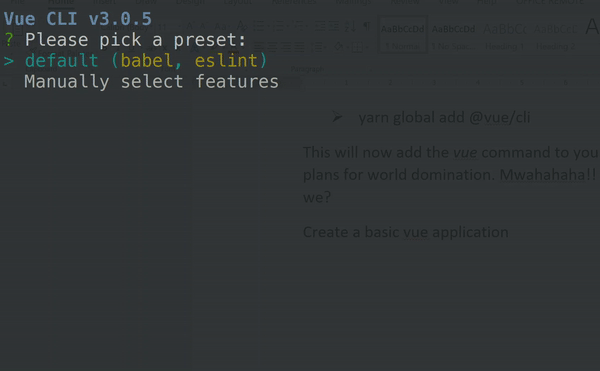
Once Yarn is ready you can install the Vue CLI using
yarn global add @vue/cli
This will add the vue command to your path and allow us to move on with the next step in our plans for world domination. Mwahahaha!! Oh… sorry. Got carried away there. Yes. Where, were we?
Create a basic vue application
Open a command prompt and set your current location to the root folder for your solution (e.g. c:\src) and run the following command:
vue create -n vue-app
The -n option tells the vue-cli to not initialise a git repository as this is an existing project and we (should) already have one.
When prompted, choose to manually select features. Include the router and exclude any linting options, then select the defaults for the prompts that follow by pressing enter. Note that the arrow keys will move between options and the spacebar will toggle the highlighted option.
This will create a default application in the src/vue-app folder.
When we build our Vue code, we’ll deploy it to the wwwroot folder of our VueApi site in order to serve it up to browsers.
Configure the vue-cli-service
Vue provides a service that supports the building and serving JavaScript applications. You can see more about what it does at https://cli.vuejs.org/
Since we’re going to be serving the JavaScript content from our existing web API site, we won’t need the cli-service’s web server capabilities. We’re only interested in the building and packaging of our vue files for distribution.
The defaults provided by vue are good for many people, but won’t quite work for us so we’ll need to configure things slightly.
If we wanted, we could configure everything via JavaScript config files, but since vue-cli provides a handy UI for managing the basics of these configurations, and I know how many people like using UIs, we’ll go down that path instead.
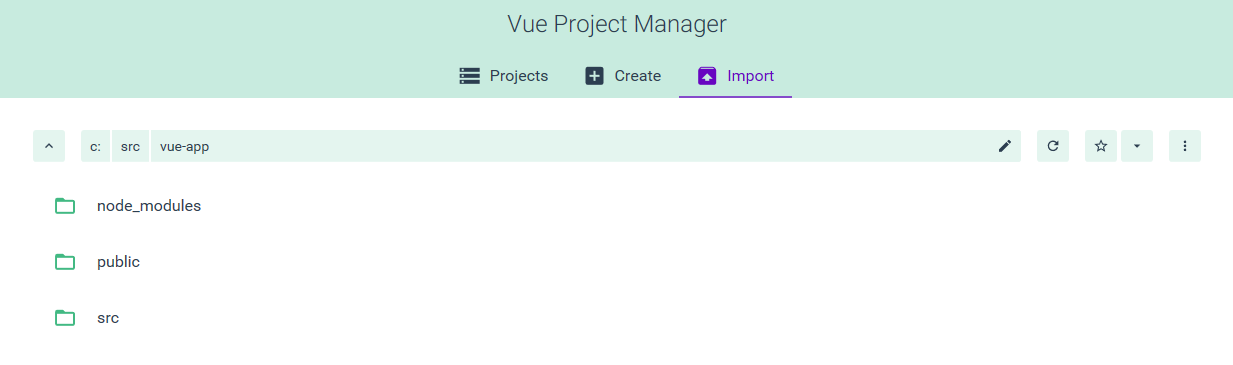
From your command line, set your current directory to the new vue-app folder and start the UI by running
vue ui
Go to the project manager (http://localhost:8000/project/select) and choose to import an existing project by clicking “Import this folder”
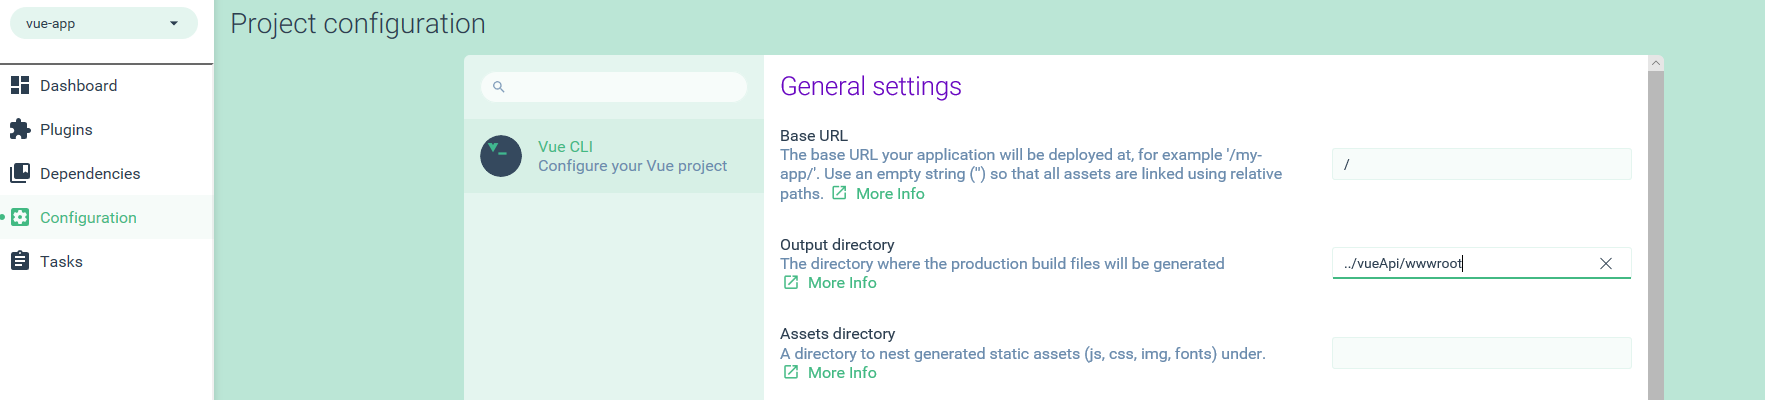
Once the project is loaded, the UI will show you the project dashboard. Select the configuration menu and adjust the setting for the Output Directory to use ../vueApi/wwwroot as follows:
Next, head to the tasks section are select the build task.
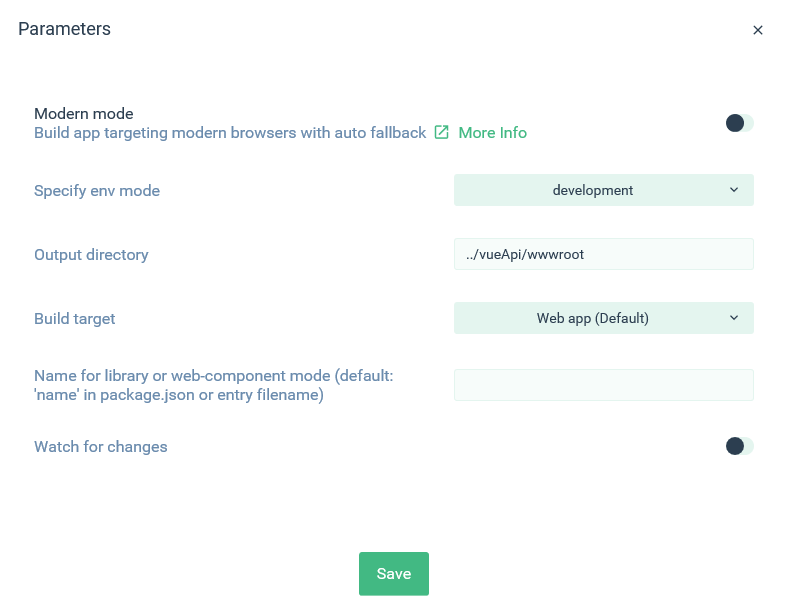
Click the parameters button and ensure that Modern Mode is off, the env mode is set to development, and set the output directory to ../vueApi/wwwroot (the same folder we used in the overall configuration).
You can also enable watch for changes so that whenever any of our vue-app source files are saved the vue-cli-service will automatically rebuild our code and copy it to our output folder.
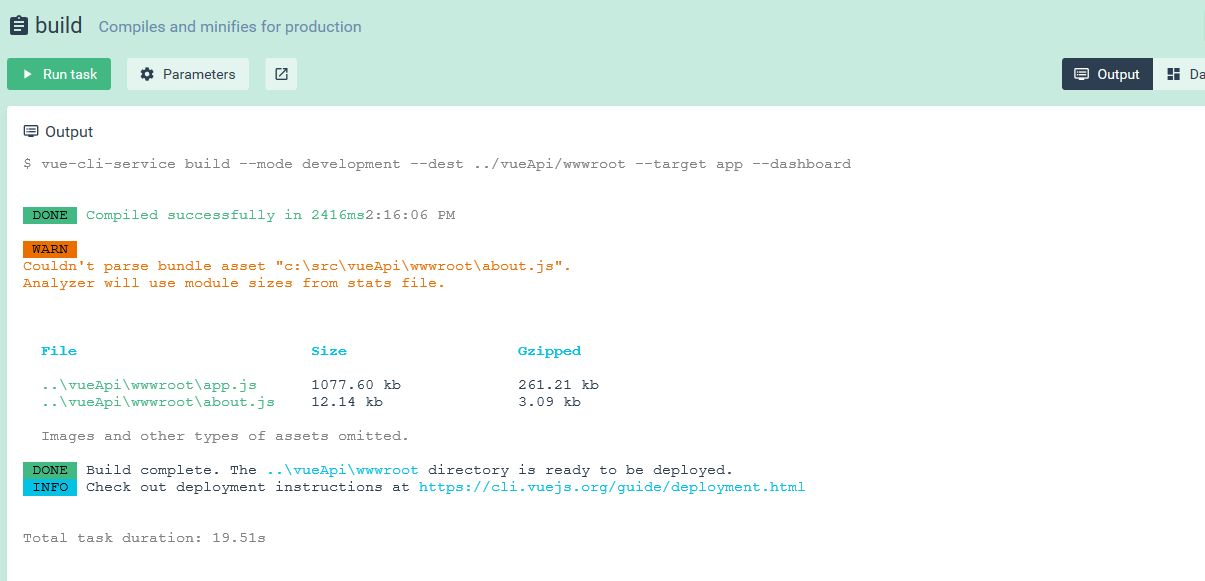
Start the build task and look in the output tab to ensure some activity is occurring.
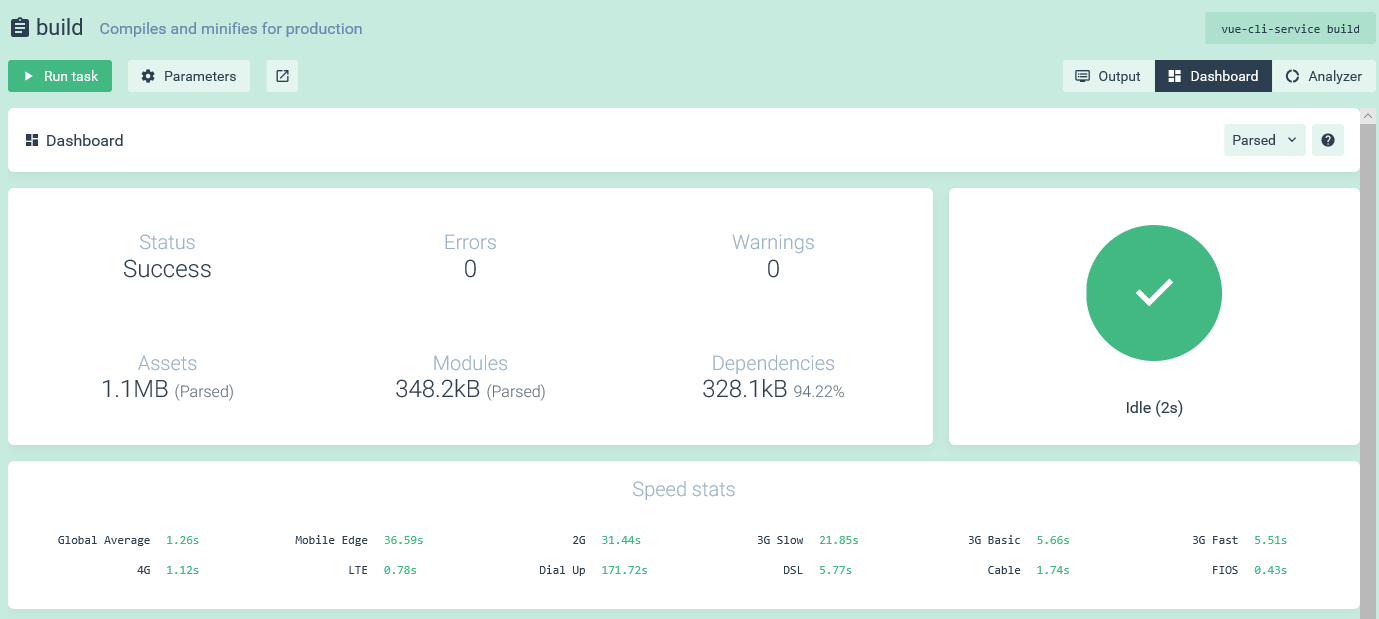
The dashboard should also be showing fresh data for you to look at
Serving up the SPA
This is a good start, but before we get too excited we want to ensure we can serve up our the build output to our visitors.
Head back over to Startup.cs in the Web API project and in the Configure() method replace app.UseMvc() with
            app.UseDefaultFiles();
            app.UseStaticFiles();
            app.UseMvc(routes =>
            {
                routes.MapSpaFallbackRoute(
                    name: "spa-fallback",
                    defaults: new { controller = "CatchAll", action = "Index" });
            });
The CatchAll controller will simply ensure that direct browsing to a non-root URL will still serve up the vue application. Routing in Vue will then determine which components get rendered.
Add an empty MVC controller named CatchAllController, and change the Index method as follows
        public IActionResult Index()
        {
            return File("~/index.html", "text/html");
        }
OK. Let’s give it a go.
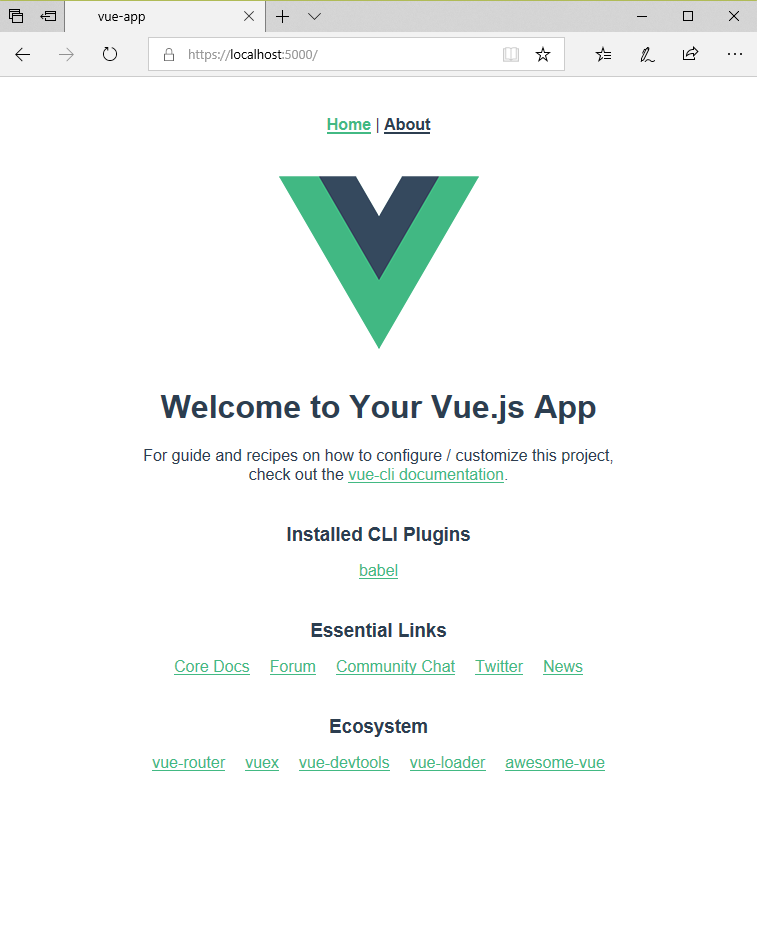
Start the web app (the VueApi application) and browse to the root at https://localhost:5000. You should see the following:
Wonderful! We now have our JavaScript build environment up and running, and we’re able to serve up the static content to our site visitors.