Securing a Vue.js app and API with IdentityServer - Part 4
This is part 4 of a series showing you how to secure a Vue.js app with IdentityServer and call an ASP.NET Core Web API.
- Part 1 - Overview and Solution Structure
- Part 2 - Creating and Configuring your IdentityServer
- Part 3 - Adding Google Authentication to IdentityServer
- Part 4 - Creating and securing an ASP.NET Core Web API (this post)
- Part 5 - Creating the Vue.js client
- Part 6 - Calling an HTTP API from Vue.js
- Part 7 - Securing a router view in Vue.js
- Part 8 - Calling a secured API from Vue.js
- Part 9 - Refreshing identity tokens with Vue.js
Note: You can find the source code for this post series on GitHub.
Creating and Securing a Web API
If you’re joining the series now, then welcome! We’re assuming you have followed along with the previous parts in the series, so it may be worth familiarising yourself with them before continuing.
We’re going to go back to our VueAPI project now, and you may recall that the default project template we use gives us a simple ValuesController.
We’re going to leave that untouched as we’ll be using it to make sure unauthenticated access is still working as expected.
We’ll extend our API by adding a new controller that returns a list of objects. When we get to creating our Vue.js client application we’ll be showing these objects on the page, but only for authenticated users.
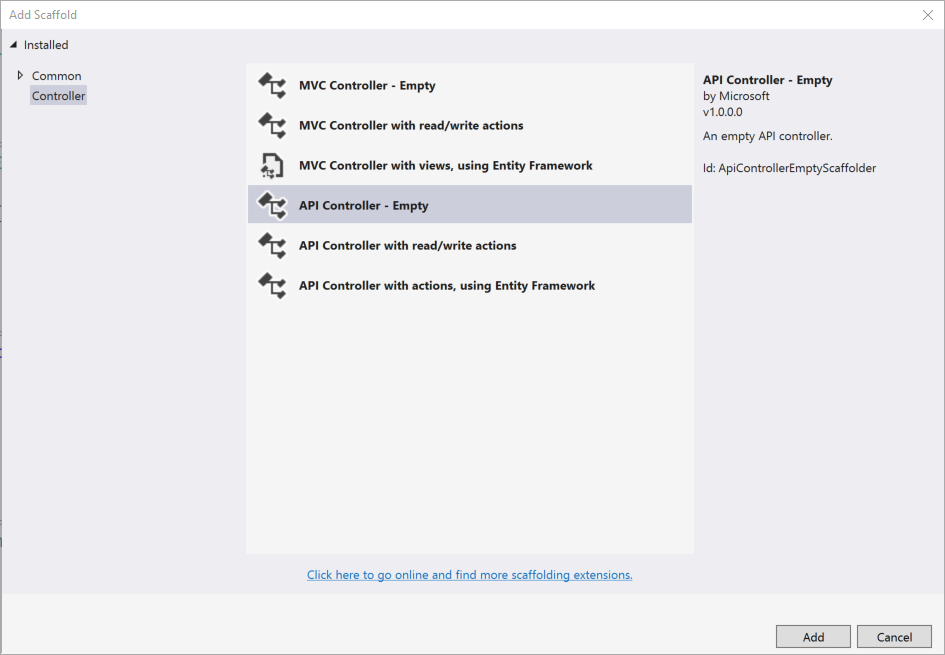
To create the API, right click the Controllers folder in Visual Studio and choose to add an empty API Controller named ServicesController.
We’re going to return a list of services my current employer Readify offers. I know you’d love you to explore and see how Readify can help you but for now I’ll ask you to pay attention to this blog series and visit the site later.
The API we’ll provide is going to return a collection of objects with service metadata. Here’s an implementation you can copy and paste if you’re following along.
[Route("api/[controller]")]
[ApiController]
public class ServicesController : ControllerBase
{
    [HttpGet]
    public ActionResult<IEnumerable<ServiceDto>> Get()
    {
        return new ServiceDto[] {
            new ServiceDto() {
                Name ="Development",
                Uri="https://readify.net/services/development/",
                IconUri="https://readify.net/media/1187/development.png"
            },
            new ServiceDto() {
                Name ="Innovation and Design",
                Uri="https://readify.net/services/innovation-design/",
                IconUri="https://readify.net/media/1189/light-bulb.png"
            },
            new ServiceDto() {
                Name ="Data and Analytics",
                Uri="https://readify.net/services/data-analytics/",
                IconUri="https://readify.net/media/1184/data.png"
            },
            new ServiceDto() {
                Name ="DevOps",
                Uri="https://readify.net/services/devops/",
                IconUri="https://readify.net/media/1188/devops.png"
            },
        };
    }
}

public class ServiceDto
{
    public string Name { get; set; }
    public string Uri { get; set; }
    public string IconUri { get; set; }
}
We aren’t securing our new API just yet. We need to make sure the API is actually working first, before we add security over the top of it.
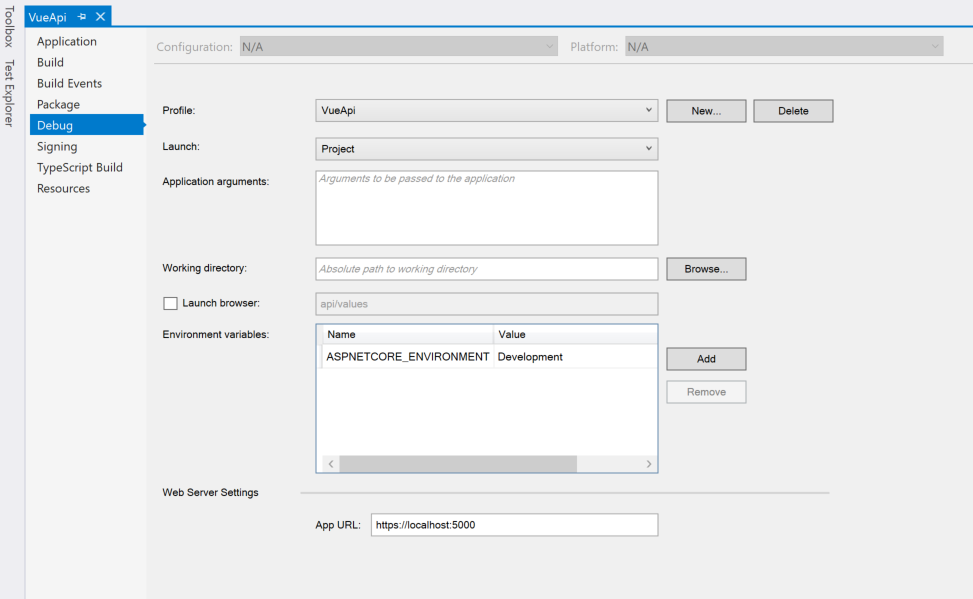
P.S. I forgot to mention it earlier, but if you haven’t already done so, make sure that your
VueApiproject is configured to listen usingHTTPSon port 5000 (the default HTTPS port is 5001). From a security perspective it’s a good practice to always run with HTTPS these days and to get used to developing without any HTTP options at all.
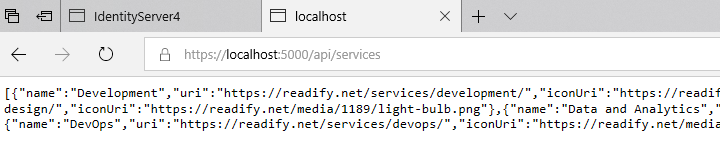
Start the site and browser to http://localhost:5000/api/services and confirm you see a JSON result (use your browsers developer tools to see the network trace).
Securing the API
Great! Now that we’re happy our insecure version works, let’s secure the API!
Being by adding the IdentityServer4.AccessTokenValidation package from NuGet
Install-Package IdentityServer4.AccessTokenValidation
In Startup.cs add the following lines to the end of the ConfigureServices() method:
JwtSecurityTokenHandler.DefaultInboundClaimTypeMap.Clear();
services.AddAuthentication(JwtBearerDefaults.AuthenticationScheme)
    .AddIdentityServerAuthentication(options =>
    {
        options.Authority = "https://localhost:5443/";
        options.RequireHttpsMetadata = true;
        options.ApiName = "api1";
    });
If you’re missing references, you may need to manually add some using statements: using System.IdentityModel.Tokens.Jwt; and using Microsoft.AspNetCore.Authentication.JwtBearer;
In the Configure() method we need to add a call to UseAuthentication() before we UseMvc().
While we’re here changing code and since we’re not supporting HTTP we can remove the HttpsRedirection call. We can also remove HSTS for now, as we’re not going to production with this code and we don’t need the hassle that HSTS adds just yet.
The Configure method now looks like the following:
public void Configure(IApplicationBuilder app, IHostingEnvironment env)
{
    if (env.IsDevelopment())
    {
        app.UseDeveloperExceptionPage();
    }

    app.UseAuthentication();
    app.UseMvc();
}
At this point authentication is configured, but we don’t actually check it anywhere.
Let’s tell ASP.NET that our /api/services route is meant to be secure.
Add the [Authorize] attribute to the controller class definition
    [Route("api/[controller]")]
    [ApiController]
    [Authorize]
    public class ServicesController : ControllerBase
    {
        //...
If the [Authorize] attribute isn’t resolving, check that you have using Microsoft.AspNetCore.Authorization; included at the top of your file.
Start the application again and you should now find that any attempt to browse to the /api/services URI will return a HTTP 401 Unauthorized response, while calls to /api/values will still work as expected.
Excellent!
Unfortunately at this point it will now become a bit tricky to manually test that the authentication is working.
We would need a known client application to connect to IdentityServer with, we’d need the identity token it would return, and we’d need to attach that as the Bearer token authentication for each call to the API.
We should probably just go ahead and build the client app now, right?
I agree! Let’s forge ahead with part 5
Up Next: Part 5 - Creating the Vue.js client