Securing a Vue.js app and API with IdentityServer - Part 3
This is part 3 of a series showing you how to secure a Vue.js app with IdentityServer and call an ASP.NET Core Web API.
- Part 1 - Overview and Solution Structure
- Part 2 - Creating and Configuring your IdentityServer
- Part 3 - Adding Google Authentication to IdentityServer (this post)
- Part 4 - Creating and securing an ASP.NET Core Web API
- Part 5 - Creating the Vue.js client
- Part 6 - Calling an HTTP API from Vue.js
- Part 7 - Securing a router view in Vue.js
- Part 8 - Calling a secured API from Vue.js
- Part 9 - Refreshing identity tokens with Vue.js
Note: You can find the source code for this post series on GitHub.
Adding Google authentication to Identity Server
If you’re joining the series now, then welcome! We’re assuming you have followed along with the previous parts in the series, so it may be worth familiarising yourself with them before continuing.
If it’s not already open, open the IdentityServer project we created in the previous parts. Navigate to line 26 of Startup.cs and you’ll see code to configure default authentication using a standard username and password approach (.AddAuthentication()) as well as for Google and a 3rd party OpenIdConnect provider.
We’re not going to use the 3rd Party OpenId Connect provider, so go ahead and delete that code.
The Google ClientId and Secret values in the Quickstart are default ones provided by the IdentityServer team and are great for learning concepts, but not for running your own identity provider. We’re going to create our own ClientId and Secret.
Authenticating your app with Google
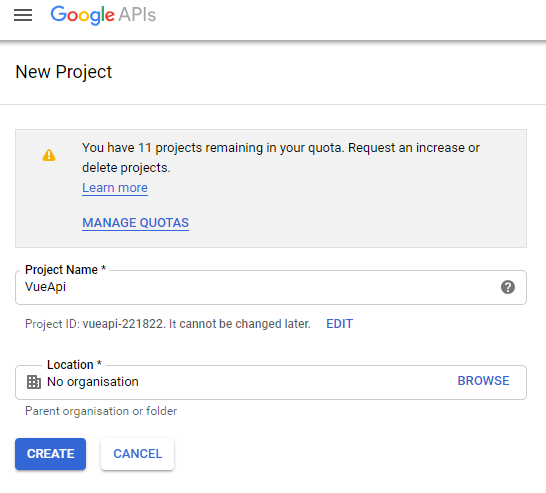
Begin by logging in to the Google Developer Console - https://console.developers.google.com/ and creating a new project in the Google APIs section.
When the creation operation completes you should be on the API Dashboard. Go directly to the credentials area.
As a first step we need to configure the OAuth consent screen. Set the Application Name to Vue API Demo and save the changes.
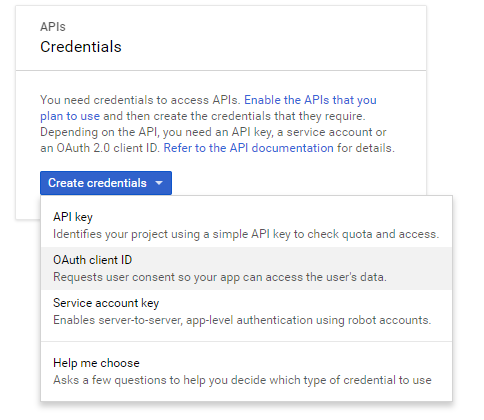
From the Credentials tab, click the Create Credentials drop down and select the OAuth client ID option
Choose Web Application and provide a name of your choice.
Set the Authorised Redirect URIs to https://localhost:5443/signin-google and then click Create. Note that this URL must be /signin-google from the base URL of your IdentityServer instance.
You’ll now be shown your Client Id and Secret.
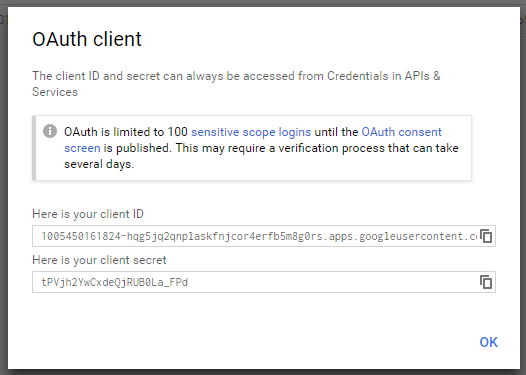
These are the details you need to update in your IdentityServer configuration. Your code in Startup.cs should now look something like this:
services.AddAuthentication()
    .AddGoogle("Google", options =>
    {
        options.SignInScheme = IdentityServerConstants.ExternalCookieAuthenticationScheme;

        options.ClientId = "1005450161824-hqg5jq2qnplaskfnjcor4erfb5m8g0rs.apps.googleusercontent.com";
        options.ClientSecret = "tPVjh2YwCxdeQjRUB0La_FPd";
    });
There’s one final step before you move on. You need to enable the Google+ API in the Developer Console.
From the Dashboard add an API and select Google+.
Now you should be set to go. Give it a try!
Start IdentityServer and navigate to https://localhost:5443/grants. Log in using your Google account, or use one of the pre-configured demo users (i.e. bob or alice, with a password of password).
Brilliant! We’ve now got an API, and a basic IdentityServer running, with support for Google SignIn.
Up Next: Part 4 - Creating and securing an ASP.NET Core Web API